
Exhibition checklist: 40 points from objectives and stand booking through graphics, power and logistics to dismantling and follow-up – plus a packing list.
In short
An exhibition appearance can be planned in seven phases with 40 points – from objectives and stand booking through graphics, power and logistics to dismantling and follow-up. The things most often forgotten are the power connection and cables, the permitted build height from the show's technical guidelines (often 250 cm), a trial set-up and following up on contacts.

A trade show appearance consists of dozens of small tasks – and it is usually the one you forgot that causes stress on the first day: the missing extension cable, the back wall that is too tall, the print with the old logo. This checklist sums up the 40 most important points, from your first objectives to the follow-up. Print it out or copy it into your project tool and tick it off point by point.
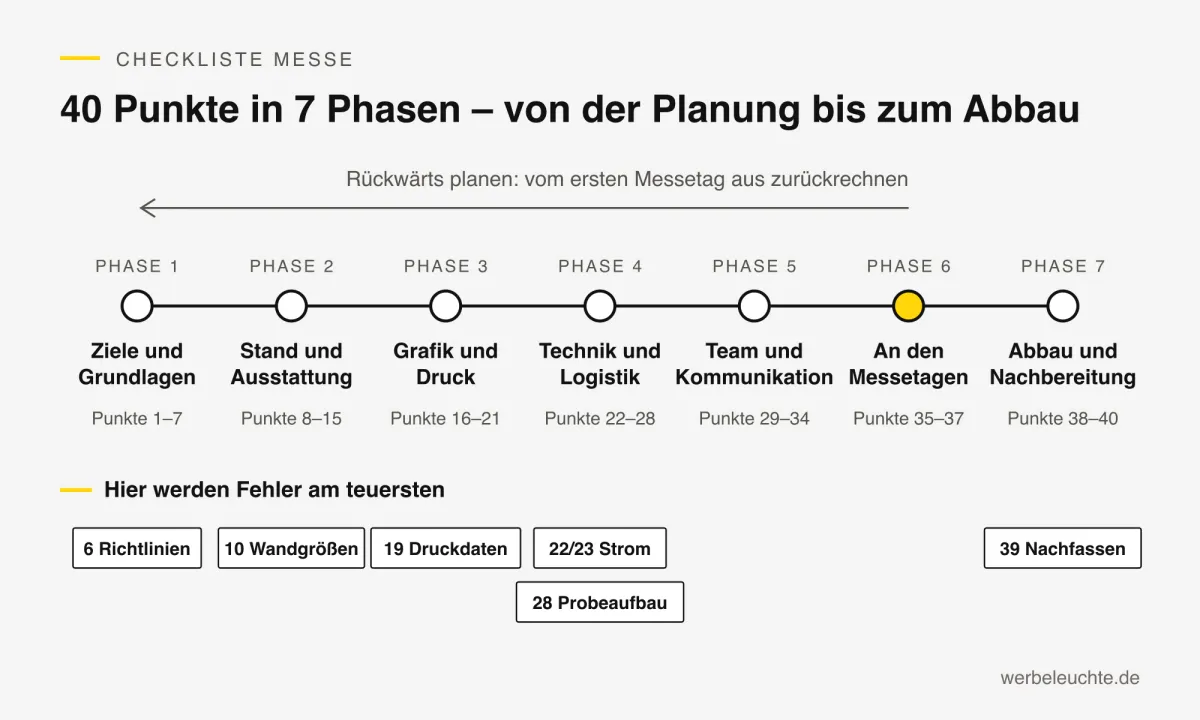
Phase 1: Objectives and basics
- 1. Set your objective: New contacts, looking after existing customers, launching a product or showcasing the brand? The objective determines stand size, design and staffing.
- 2. Define KPIs: For example, the number of qualified conversations, appointments or quotes after the show. Only what you measure can be evaluated later.
- 3. Draw up a budget: Stand space, stand construction, printing, logistics, staff, travel, hospitality. You will find an overview of the cost items in our guide How much does an exhibition stand cost? Cost items and prices.
- 4. Choose the fair: does the audience match your target group? Visitor profile and exhibitor list from the previous year give clues. Our trade fair calendar 2027 & 2028 shows dates, venues and cycles of the major fairs in Germany.
- 5. Book your stand space: Good spots go early. Pay attention to the stand type – row, corner, peninsula or island stand – and to its position in the visitor flow.
- 6. Read the technical guidelines: They cover build height, distances to neighbours, fire safety, electricity and deadlines. Save the document where everyone involved can find it.
- 7. Put deadlines in the calendar: Registration deadlines for electricity, internet, exhibitor passes, catalogue entry and build-up times.
Phase 2: Stand and equipment

- 8. Decide whether to buy or rent: If you exhibit regularly, your own system is often the cheaper option. Our guide Buy or rent an exhibition stand? The maths from the third show shows the calculation.
- 9. Draw a stand plan: Mark the back wall, side walls, counter, poseur tables and walkways to scale – including the footprint depth of the walls.
- 10. Set the wall sizes: Choose width and height to suit the stand and the guidelines. Our guide Exhibition wall sizes: which width for which stand? gives an overview.
- 11. Illuminated or unlit: In bright halls, a backlit back wall such as the LED Exhibition Wall XL stands out far more.
- 12. Choose a counter: Straight, corner or U-shape – and with or without lockable storage. More in our guide Exhibition counters: foldable, illuminated, printed – buying guide.
- 13. Plan a vertical element: An LED Light Tower or a light totem marks your stand from a distance.
- 14. Consider a screen: Do you need moving images for product videos? A Digital Totem 49 inch saves wall space.
- 15. Furniture and flooring: Poseur tables, stools, brochure stands, carpet or floor covering – what does the venue provide and what do you bring?
Phase 3: Graphics and printing
- 16. Formulate your key message: One sentence that can be understood from ten metres away. Logo and message belong above head height.
- 17. Download artwork templates: Download the right template with bleed and safe zone for each element – all collected under Artwork templates.
- 18. Design the graphics: Back wall, side walls, counter front, tower sides. Make sure the imagery is consistent.
- 19. Check the artwork files: Bleed, resolution, colour mode. The details are in our guide Artwork for fabric printing: bleed, resolution, colour.
- 20. Get sign-off: Have one responsible person approve all graphics – typos across three metres of width get noticed.
- 21. Order printing in good time: Allow enough buffer for production and delivery before the build-up day. At werbeleuchte.de, the delivery time is 3–5 working days after receipt of payment and print approval.
Phase 4: Technology and logistics
- 22. Calculate your power requirement: Add up the power consumption of all illuminated elements and screens. The values are listed for each of our products.
- 23. Order a power connection: Book it from the organiser to match the calculated requirement. With a Y-connector for LED exhibition walls, you can run two walls from one connection.
- 24. Pack cables and distribution boards: Power cables, multi-socket extension leads and cable ties. Do not route cables through the visitor area.
- 25. Sort out internet access: The venue's Wi-Fi, your own mobile network or offline operation for screens.
- 26. Check fire safety: What certificates does the trade show require for decorations, fabrics and printed materials? Clarify the requirements early with the organiser and your suppliers.
- 27. Organise transport: Who drives, which vehicle, how many cases? Our systems travel in ABS transport cases with wheels and a handle.
- 28. Do a trial build: Set up the complete stand once – with prints, power and screen. That way you know how long it takes and whether everything is there.
Phase 5: Team and communication
- 29. Draw up the stand rota: Who is on the stand and when? Plan breaks and handovers.
- 30. Brief the team: Objectives, key message, products, prices, contact persons and how to handle leads.
- 31. Order exhibitor passes: For stand staff and build-up helpers.
- 32. Send invitations: Invite customers and prospects in advance and arrange appointments at the stand.
- 33. Announce it online: Website, newsletter, social media, email signature with hall and stand number.
- 34. Prepare lead capture: Form, app or scanner – and a clear rule on who follows up which contacts.
Phase 6: On the show days
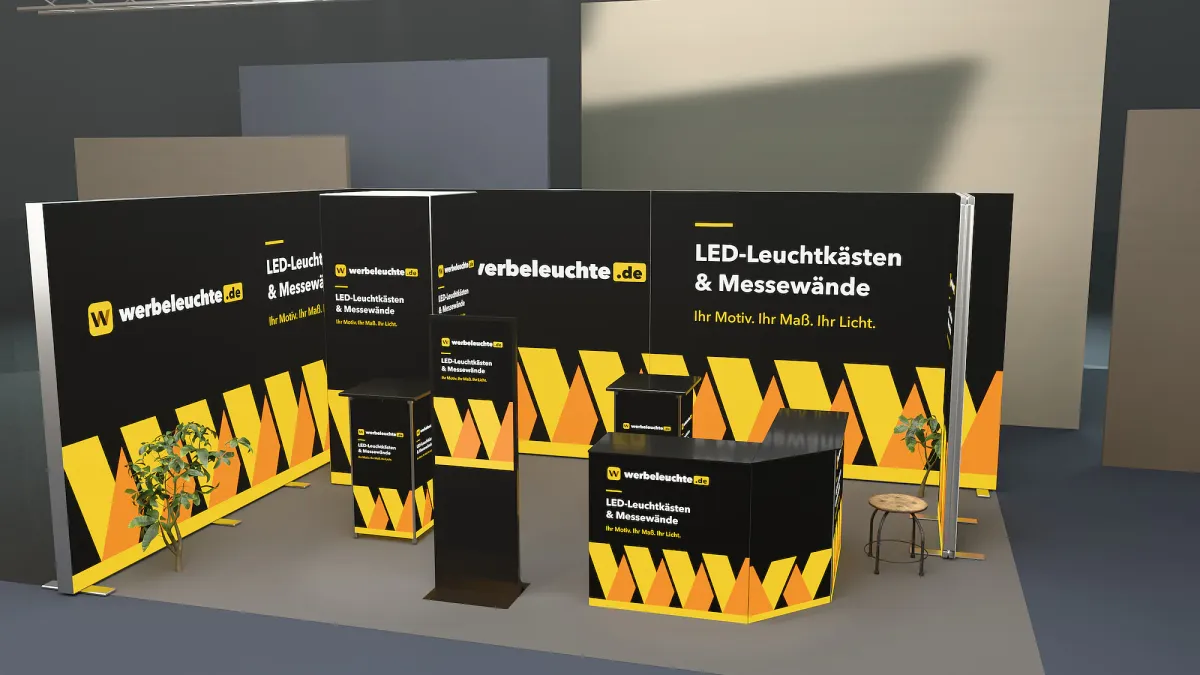
- 35. Be at the stand early: Switch on the lights, check the screens, top up brochures, tidy the counter.
- 36. Be approachable: Don't hide behind the counter, don't stare at your phone, don't turn your back to the aisle. The counter works better set back a little than right at the edge of the aisle.
- 37. Note contacts immediately: Record what was discussed, the level of interest and the next step straight after each conversation – by the evening, much is forgotten.
Phase 7: Dismantling and follow-up
- 38. Dismantle carefully: Pull the prints cleanly out of the profile groove and pack them separately from the profiles. Return all profiles, connectors and feet to the cases.
- 39. Follow up contacts: Get in touch within a few days, while memories are fresh. Send quotes and appointments as promised.
- 40. Evaluate and learn: Evaluate the KPIs from point 2, calculate the cost per contact and note down lessons for the next show. Reorder missing parts – such as connectors or feet – straight away; you will find spare parts under Accessories.
How to use the checklist as a team
A checklist only works if every point has a name and a date. Three tips from practice:
- One person in charge: Even if many people are involved, one person keeps track and ticks things off.
- Plan backwards: Start from the first show day and count back: when must the stand be loaded, the print delivered, the graphic approved and the design started? Ask for specific delivery times when you order instead of planning with estimates.
- Update after the show: Add what was missing and delete what was unnecessary. That way the list gets better with every show.
For small teams exhibiting for the first time: focus on points 6 (guidelines), 10 (wall sizes), 19 (artwork files), 22 and 23 (power), 28 (trial build) and 39 (follow-up). These are the places where mistakes are most expensive.
Packing list: trade show essentials that often get forgotten
| Area | Take along |
|---|---|
| Power | Power cables, multi-socket extension leads, cable ties, adhesive tape |
| Tools | Cutter, scissors, small tool kit, spare screws |
| Stand | Spare connectors, cleaning cloth, bin bags, vacuum cleaner or broom |
| Office | Business cards, pens, notepads, tablet or laptop with charging cable |
| Marketing | Brochures, price lists, samples, giveaways, prize draw cards |
| Team | Water, snacks, comfortable shoes, plasters, headache tablets |
| Documents | Exhibitor passes, order confirmations, emergency numbers, stand plan |
The quick route: a stand from one system
Many points on this list become easier when walls, counter and tower come from one system family: the same connectors, the same cases, the same artwork templates. Our 20 complete packages from 2 × 2 m to 10 × 10 m on the Exhibition stand page combine exactly these elements – including printing of all visible surfaces, matched to the stand type from the row stand to the island stand. Package S, for example, costs €8,538.26 incl. VAT (€7,175.00 net). Without your own artwork, our design service designs the complete stand at a fixed price – package S for €490, M for €750, L for €850, XL for €990 net, each with design concept (key visual), adaptation to all print surfaces, final print-ready artwork and 2 rounds of corrections. You will find more inspiration in the guide Exhibition stand ideas: 25 examples for small and large stands.